|

|
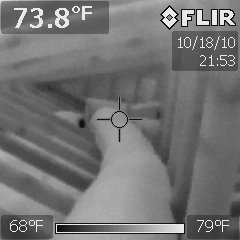 Picture Far Right: Picture of an attic, the ductwork and trusses are readily visible. The small dark spot is a very minor AC leak, very common. Infrared photography (thermal
imaging) can be an extremely useful tool for performing all types of inspections. However it is just that, another tool,
and in the right hands a very powerful tool. It can save time and find things not easily found by any other means. It
CAN NOT see through walls, it merely displays surface temperatures as an image that we can see and decipher. It's not
a stand alone tool either. Other tools and means are carried out to understand why the camera is showing a difference
in temperature. Many factors can cause temperature variations and those all need to be taken into consideration. These
include type of material in the image, location, rate of change of temperature and even the time of day and the temperature
outside vs. inside (low or high Delta-T), or in some cases from one room to another or an attic to living space. So
they have their limitations to be sure. Therefore, the camera is used to find an anomaly and other means/tools are used
to come up with a finding. This is where the camera "shines"! It can quickly scan an entire structure
and show missing insulation, moisture intrusion, electrical issues, mechanical issues and a whole host of other things. Fresh
paint over damp drywall doesn't even begin to hide the issue. The camera will show this area in seconds if the conditions
allow. It is an amazing piece of hardware that I would not want to do any inspection without. Let's take a quick example here: Let's
say the house has a freshly painted ceiling, maybe covering up water stains, maybe not. Maybe those water stains are dry,
maybe not. Let's also assume that nothing is visible to the naked eye. This is a fairly common scenario. Now
I suppose you could take a step ladder with a moisture meter and touch it to the entire ceiling and check it for high moisture
levels and then you could do all the walls. Nobody in the industry does that and I don't blame them. I don't either.
It could take all day and let's be fair, it's just not industry standard. With a FLIR infrared imaging camera I can
scan a house in minutes, ceiling and walls! Does it show moisture? No, but moisture has several properties that make
it stand out very well in the infrared. I may find an anomaly or two. THEN I can get out the step ladder and check
those areas with the moisture meter and verify whether it's moisture, or maybe it's just a leaky duct in the attic cooling
or heating an area. It's not just a time saver, it makes things that just weren't practical by conventional means, very
quick and fairly straightforward if you know how to use the camera correctly (along with the other tools of course). To put it simply, the FLIR thermal imaging
camera makes me a better equipped inspector. No question about it. I think in the next 5-10 years, every inspector
will have to have one to remain competitive. Can you do a good inspection without one? Yes, of course, I've done thousands
without one. Would I leave home without it now....no way! Here are some thermal images to show what can be found and what
it looks like. Again, all these findings were confirmed by other means and some are just interesting to see.
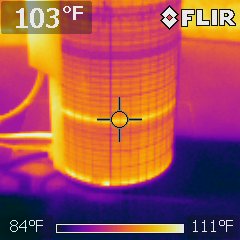 Left: This picture was taken of an outside AC condenser.
You can easily see the refrigerant coils run through the condensing coil. The unit was running just fine with
Delta-Temps right on spec. The color should be fairly consistent along the entire length of the coil. This may
indicate a blockage on one of the lines that may shorten it's lifespan. This unit should be serviced to see if they
can clear up the problem. This unit may also run fine throughout it's design life. That's where an inspector can
get into problems with guessing. There is no concrete data on how this would/could affect the units performance. The
best course of action may be just to have it re-scanned seasonally to see if there are noticeable changes in it's heat signature,
or after it's serviced to see if there is a change.
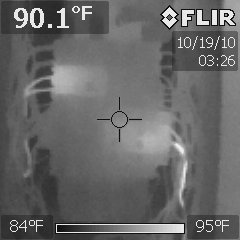
 Right: This picture is the base of a toilet. It
looked completely normal in a normal photo. However when you see it in the infrared you can see water is seeping under
the tile around the base. This is a leak in the wax ring. A baseline photo was taken before it was flushed, everything
looked normal even in the infrared. Then, 5 minutes after flushing the toilet, you can plainly see the leak. This
was also confirmed with a moisture meter just to be sure. A pretty cheap fix can save more money/problems down the road.
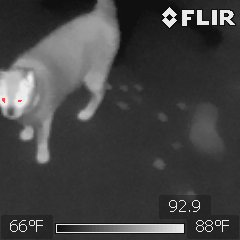 Right: In this picture you can see several things.
Of course you can see the cat and on this setting on the camera his eyes show up as red because they are the warmest
objects in the photo. You may also notice the cat's footprints behind him. Just the act of walking transfers enough
heat to the carpet to show up on the infrared camera for 30 seconds or so. You can also see my footprint as I walked
by the cat, turned around and took his picture. This just illustrates how sensitive this camera is, and how you can
see things you may never have thought even existed!
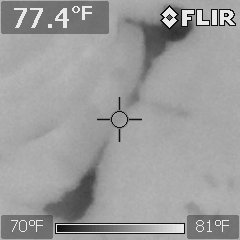
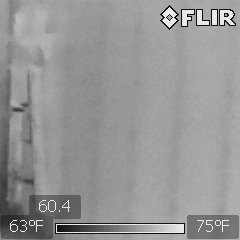 Left: This picture illustrates why some people think
it can see through walls. It does not, it only sees the surface temperature, but you can see the temperature of things
inside the wall if they affect the surface temperature. This photo is a drywall covered wood frame wall. On the
left you can make out an aluminum ladder hanging on the wall. On the main part of the frame you can see that the wall
studs show themselves because they are a bit cooler than the rest of the wall cavity. Thus they make the surface of
the drywall a bit cooler. On really hot days or really cold days for that matter, it can make a great stud finder in
an outside wall (an incredibly expensive stud finder!). It can also show water pipes, electrical lines and many other
things inside a wall if the conditions are right and those items affect the surface temperature of the wall section you are
looking at.
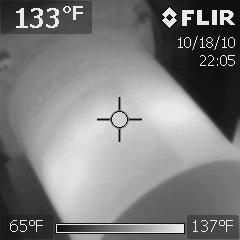 Right: This is a thermal image of a water pump motor housing . The pump did not run at all throughout the inspection. It was plugged in but not running. I scanned it with the infrared camera and this is what came up. The motor was hot, likely a short in the windings that would eventually trip the overload. It would cool back down, reset, and start all over again. The pump was later replaced. 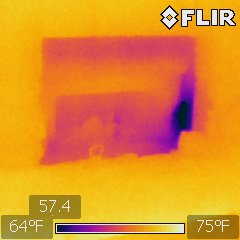 Left: This is an image of a fireplace. It was a cold day and obviously there was no fire, but what you can see is a significant cool air infiltration on the bottom right of the unit. Fixing very minor issues like this can save a lot of money on heating and cooling bills, not to mention wear and tear on air conditioning units. 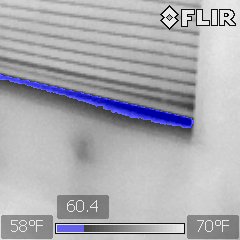 Right: This is a scan of a window with a mini blind
in the down position. This setting is a "min" setting which will highlight the coldest part of the frame in
blue. The blue area is cold air coming in the bottom of a very poorly sealed window.
 Left: This is the best illustration of what infrared imaging can do for inspections. This is an image of a breaker panel. Believe it or not everything is completely normal except for one breaker that was loose. It's the one on the right hand side of the panel. You can see how hot the wire is coming off of it. The glowing breaker on the upper left hand side was the AC circuit and it was completely normal. This was a fire hazard that literally took minutes to fix at no cost to the owner. This is why I'm in this business! |
Enter supporting content here